Click on the images to enlarge them!
January - February 2019
Colbert Embroidery
A Colourful Candybox
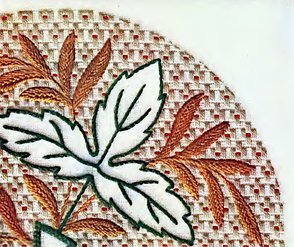
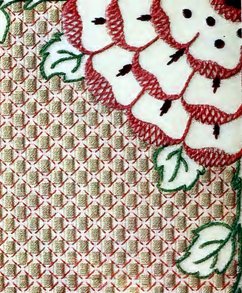
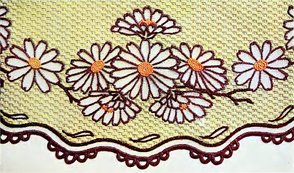
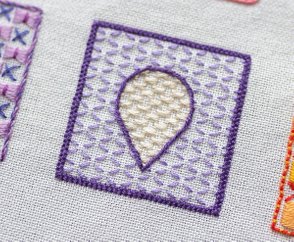
On to the nex batch. Colbert embroidery. What is Colbert embroidery? Basically, it is a style similar to Assisi embroidery, a kind of voided work, that is to say, the pattern itself is left blank, encircled by bold outlines on a patterned background. But whereas in Assisi work the background is limited to a few monochrome colours and variations of cross stitch and the outlines to Holbein stitch, in Colbert embroidery the background is filled with the full range of damask stitches in all imaginable colours, and the outlines are done in various surface stitches.
It all started around the turn of the 17th to the 18th century in France. Louis XIV, le Roi Soleil, the Sun King, was reigning, and He was reigning splendidly. Pomp and splendour everywhere around Versaille and Paris. The Lady & the Lord wore velvet, silk and the finest of laces, which had to be imported from Italy and Flanders. Expensively imported! In the long run, the Royal Treasury couldn't keep pace with the demands and whims of the Royal Court and its devotees.
A Bit of Royal History
That's when Jean-Baptiste Colbert, the French finance minister by trade, stepped in. In order to economise without snouching the French Nobility, he did what he could to restrict imports and foster exports. He set up lace making centres in France and brought over Dutch and Italian lace makers to teach. A simple type of embroidery was manufactured by homeworkers as an imitation of Dresden lace and Venetian needle lace for the well-heeled bourgeois, and from 1850 on, this type of embroidery was named after Monsieur Colbert.
Preparations
For my projects I used one of the excellent DMC booklets by Thérèse de Dillmont again, entitled Colbert Embroideries. You can download it for free from the Internet Archive. I have to admit that the designs presented there are not precisely to my taste. A bit fuddy-duddy, but the heck with it! I want to learn Colbert embroidery, and since there aren't any other designs available (and there aren't, Colbert embroidery seems to have passed into oblivion), I will use these. Maybe some other colours - and certainly no table cloths or pillowcases, thank you very much.
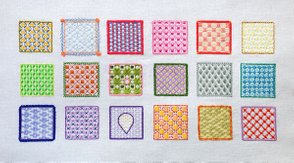
Long time was I pondering as to how I should approach my Colbert practice piece. If I had practiced on a whole design, it might as well pass for the sampler. And I would have to transfer the design somehow, because Colbert isn't pure counted work anymore. Too much hassle for a practice piece. Eventually, I came up with a notion: I would try out all the backgrounds in the book, contained in little squares, without the voided designs. Instead the outlines could be used as frames for the squares. This wouldn't be Colbert embroidery sensu strictu, but hey! It's a practice piece, designed to just practice new stitches. And the stitches would all be there.
The book contains 18 designs. 18 backgrounds. What kind of fabric would be best? An even-weave would be perfect for the background, for these so called damask stitches are counted stitches, but not so much for the outlines, since they are surface stitches. A plain-weave on the other hand would distort the background stitches to a certain degree. Let's see what Mme Dillmont has to say on the subject:
The material generally used for this work is a canvas or linen made with coarse threads slightly stiffened, upon which the pattern has first of all to be traced.
I didn't want to waste my only bit of good linen nor canvas for a practice piece, but I still had a larger 32 ct. scrap of Murano (Jobelan) left from my Assisi sampler, so I thought it might do the job.
The thread used in Colbert embroidery is usually pearl cotton, though they recommend as well stranded cotton, floss flax or flourishing thread. But I didn't want to waste my bits of pearl cotton or good DMC floss either. Instead I still have a huge amount of the cheap craft floss in all kinds of colour that should be used up. So I went with Murano plus cheap floss.
Prepared Fabric
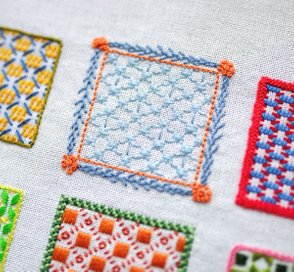
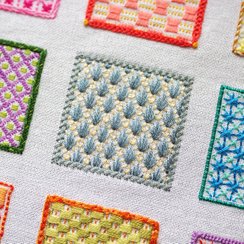
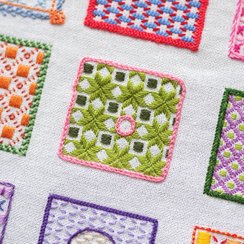
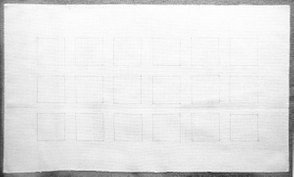
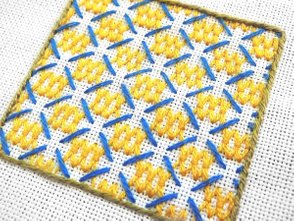
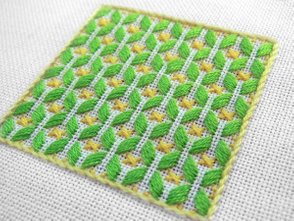
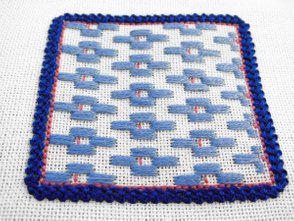
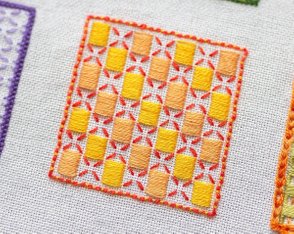
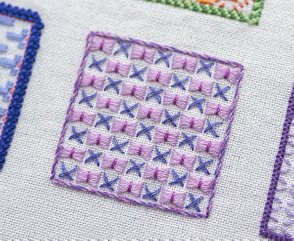
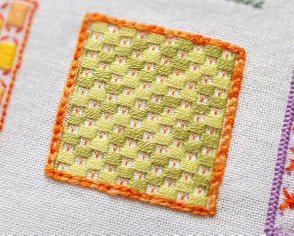
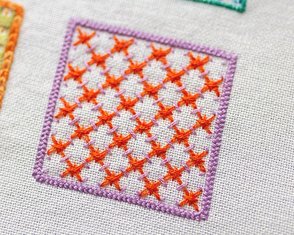
Using a ruler and a pencil, I drew 18 little squares, each 5 x 5 cm (2 x 2") large, in three rows on the (neatened, of course) fabric. And then I gave free rein to my colour fancy ... The subtitles below the photos relate to the stitch(es) used for the outline(s) in the particular square.
Problems Encountered
- There are some unclear translations in the book. Most of the outlines are done in what they call "running stitch", but as the photos show, it isn't running stitch at all. I had to have a look into the French original, where this stitch is called point coulé. Thanks to Méri from Porto, Portugal, who has published a multilingual glossary of embroidery stitches, I was able to find out that point coulé (or point de tige) is actually the well known outline stitch. And that makes sense! There were some more inaccuracies as well.
- I was somewhat disappointed by the instructions in the book. While they describe presicely all the colours and stitches used and over how many threads every stitch extends, there's nearly never an information about the exact spacing between the individidual background elements. Of course, I could have been stitching to my own liking, but that wasn't exactly the point of the exercise. The problem was aggravated by the quality of the photos. Considering the time when the book was published, the photos are neither scalable nor macros. Some patterns were really hard for me to decipher in detail.
According to the prescribed relation in the thickness of the threads, the background is stitched with 2 threads of floss, and the outlines with 3 threads of floss.
#13 Braid Stitch
#16 Couching
Lessons Learned
The chequered chain stitch (second last square) isn't especially suitable for stitching with more threads in the needle. It is also difficult to execute when you wish an irregular alteration of colours. In both cases the threads tend to tangle and knot; you have to check the back of the work after every stitch and to pay attention where you insert the needle. I think, this stitch is best suited for stitching with two threads only (the kind of thread doesn't make any difference, though) and by altering the colour one by one, say: red - blue - red - blue etc.
Maybe a Needlebook?
And here's the whole piece at one glance:
The Colbert Practice Piece
This was a useful experience in combining colours! I don't mean to brag, but I like some of my colour combinations a whole bit better than those in the book. Well, other times, other tastes. My daugther loved it. She came over everytime I finished the next square, in order to choose her favourite. And everytime she said: "I don't know what my favourite is. It's like a box of colourful candies - I can't decide which one I should choose".
At some point (strictly speaking after having got an entire set of different needles at my birthday) it occurred to me to make this piece into a needlebook ...
References:
Faden.Design. Christine Ober: Colbert-Stickerei (Frankreich) - Obviously, this page doesn't exist anymore.
the bargellist: Colbert Embroidery 2

