Click on the images to enlarge them!
January - December 2021
Needlepainting
The Secret of Long-and-Short Stitch
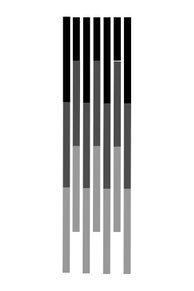
When you are looking for needlepainting, which is done in the so called long-and-short stitch (which is actually an offset long-and-long stitch), you will find in most cases illustrations looking something like this:
This is absolutely okay - as long as you are after a flattened, two-dimensional effect, where the colours blend only to a limited extend, because the colour shades are set off against each other on a straight line.
Did you ever see the incredibly naturally looking embroideries by Trish Burr? How does she achieve such an effect? Well, one thing I can say: it can never be achieved with the regularly worked long-and-short stitch shown above.
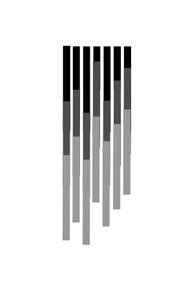
For such a natural look, you have to split the threads at varying heights to begin with. Something like this:
To see the difference in the outcome, just have a look at the following three circles:
Long-and-Short Stitch Compared
The first one is done in the "flat" manner, the second and third one in the "natural" manner. Comparing the top circle to the both below, you can clearly see the difference between a regular long-and-short stitch and needlepainting.
Apart from the irregular arrangement of the stitches, it is very important in needlepainting to align the direction of the stitches with the shape of the motif.
Long-and-Short Stitch Lessons Revisited
If you have read my First Steps in embroidery, you will know that I had embarked on Mary Corbet's L&S Lessons as a complete newbie. With the final "success" of a large hole in the fabric.
At the beginning of this year, having reached the needlepainting module in my curriculum, what would suggest itself more than doing this tutorial once again, and this time doing it right? Plus, this time using a decent linen instead of an old bedsheet, and decent embroidery threads on top of that. It surely does make a difference! After all, I had already gained some experience in long-and-short stitch in the past three years.
The exercises in this tutorial progress from easy to difficult. First exercise were two squares. It deliberately uses widely differing shades, so that we can better see how the stitches are placed.
Long-and-Short Stitch - Squares
It was not for the first time that I noticed my problems in distributing the levels evenly in terms of height. I made a sketch, but still couldn't get it right. It's a question of practice in the end, I think.
Oh my, the second square with the diagonal colour scheme is crooked and warped! Somehow I still don't like my technique ...
Next come triangles. The colours are shaded more appropriately, as you can see. But you can also see that I had gained a little more practice compared to the squares.
Long-and-Short Stitch - Triangles
Another reason for the improvement is due to the fact that I bought some more shades of floss in the meantime.
The third motif, the circles, is what you saw in the chapter above. This exercise shows clearly how important it is to "recreate" the shape with your stitches in order to achieve a natural look.
Number four is a ribbon. You see, it's getting trickier with every motif!
Long-and-Short Stitch - Ribbon
To follow the curves with your stitches smoothly, you have to go "outside the box" a bit carrying your stitches across the outlines in some places.
Two different leaves:
Long-and-Short Stitch - Simple Leaf
Long-and-Short Stitch - More Complex Leaf
And that's my current state of affairs:
Long-and-Short Stitch Tutorial
As you can see, transferring the pattern with carbon paper was not one of my smartest decisions. Carbon paper fades after some time, as you could already observe with my kaleidoscope. I have been working on this piece on and off for months now. To finish the last two motifs, I will probably have to transfer them anew.
As it turned out, I didn't have to. I stitched the last two motifs in December 21 when I was not well at all, which is perhaps why I did not keep any records. Anyway, the Long-and-Short-Stitch Tutorial is finished now and this is what it looks like:
Long-and-Short Stitch Tutorial Finished
It was a very good exercise, although it could look much better. With needlepainting it's the same as with drawing skills: some people might have an innate talent for it, but talent is of any use if you don't regularly and over a long time hone your skills. Skill beats talent! Always. So in the end everybody is able to do it by training his skills, and the secret behind every skill is ... practice, practice, practice!
Thanks to Mary Corbet for providing so many useful exercises for free! I keep hearing, "Oh, I'd love to learn needlepainting!" All I can say is, "Then why not get started with Mary Corbet's tutorial!" I certainly hope that this tutorial will help me with my next project: two blue tits by Trish Burr ... 😉


