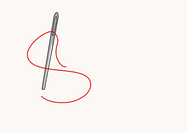
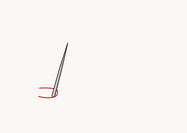
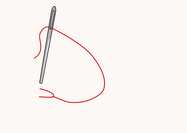
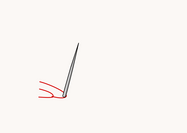
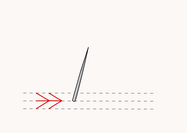
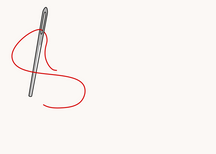
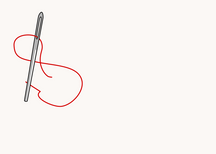
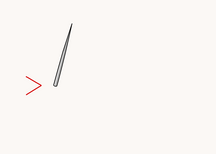
Click on the images to enlarge them!
Border Stitches
Feather Stitch
Deutsch | Federstich, Bäumchenstich, Fischgrätenstich |
English | feather stitch, briar stitch, single coral stitch |
Français | point d'épine |
Español | punto de coral |
Italiano | punto corallo |
Nederlands | taksteek |
Polski | ścieg gałązkowy |
Português | ponto pena |
Türkçe | zikzak dikiş |
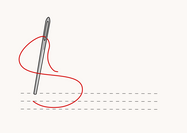
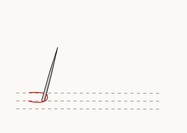
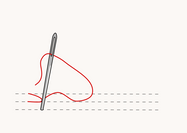
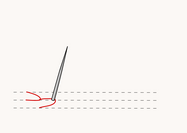
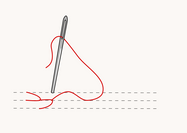
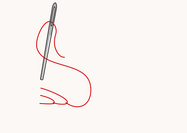
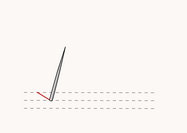
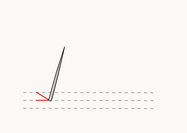
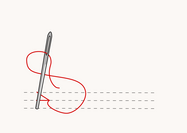
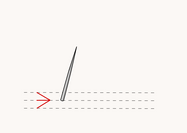
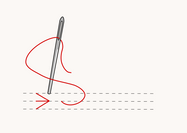
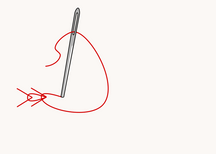
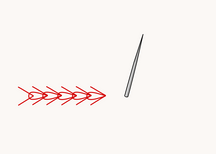
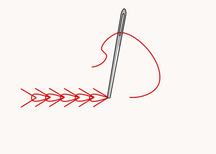
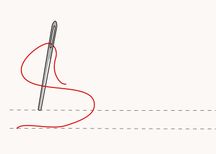
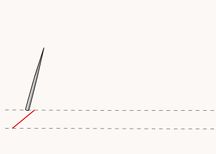
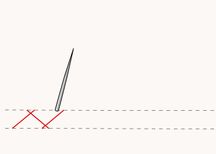
The feather stitch is an easy to work decorative stitch suited especially for the depiction of vegetation, grass, aquatic plants etc. It can be worked entirely at whim - with different spacing, different lengths of the twigs, with or without a stalk ... you name it. If you wish a very regular line, however, it is helpful to mark three parallel auxiliary lines, e. g. by using a self-extinguishing or watersoluble pen.
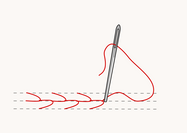
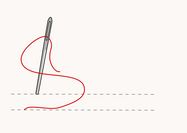
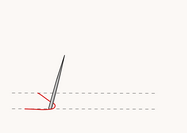
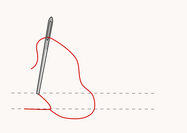
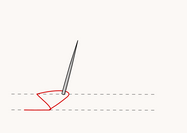
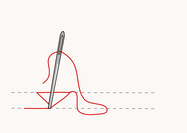
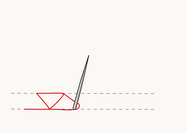
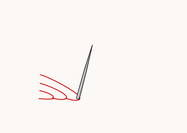
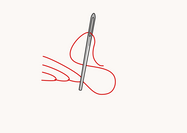
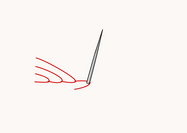
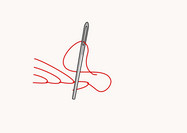
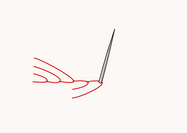
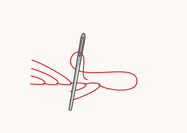
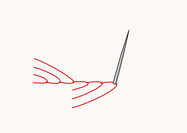
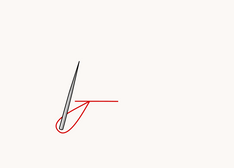
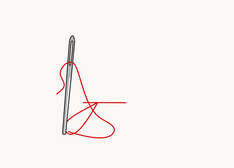
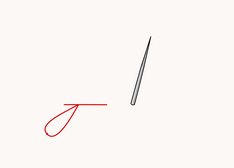
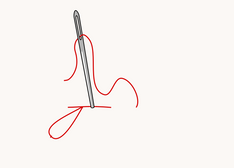
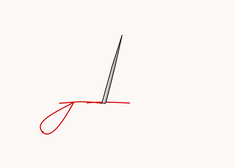
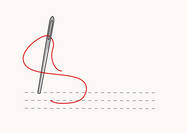
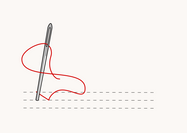
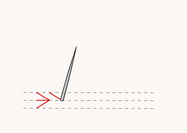
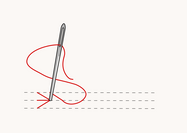
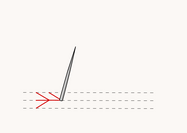
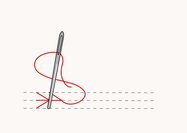
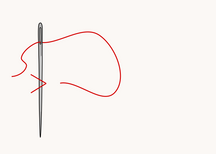
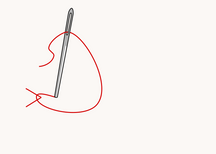
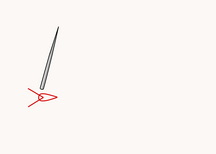
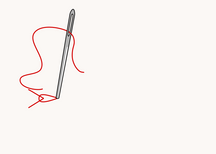
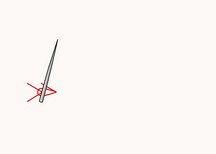
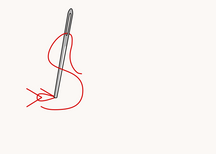
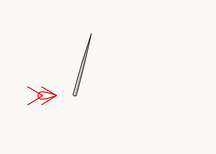
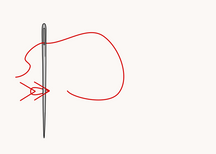
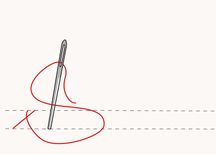
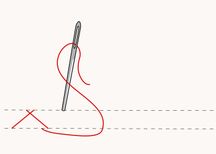
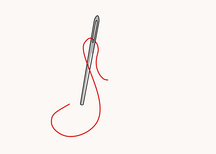
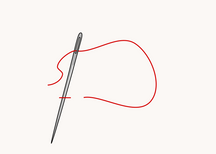
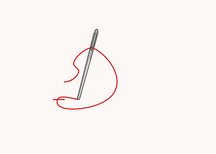
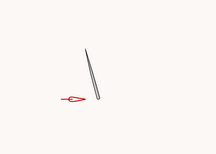
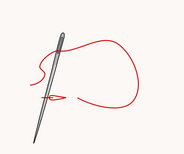
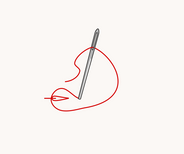
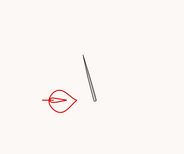
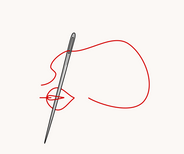
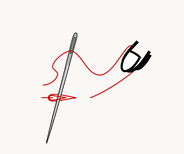
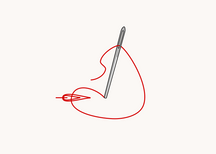
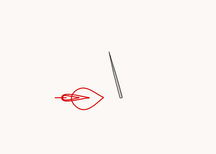
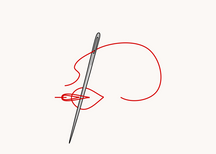
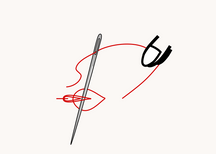
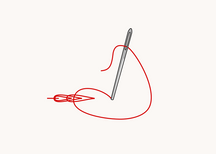
Come up at the centre line and go down at one of the two sidelines without pulling the thread through, just leave a loop on the surface. Then come up again at the centre line within this loop. Now pull the thread through, go down at the other sideline, leave a loop, come up within this loop ... and so on and so forth.
To end the line, just anchor your thread directly below the last loop, unless you wish to add a stalk, in which case bring the needle one last time down in the desired distance.
Feather Stitch
Closed Feather Stitch
Deutsch | geschlossener Federstich |
English | closed feather stitch |
Français | point d'épine fermé |
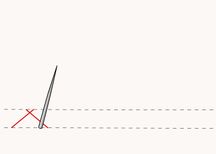
The closed feather stitch is a simple variation of the feather stitch. While the feather stitch is actually a row of Fly Stitches strung together in an open line, in the closed feather stitch, these fly stitches become locked in one another, so that some kind of a decorative border is produced, with a zigzag line within. Or else a line of slotted together triangles. Whatever pattern you choose to read out of it - this stitch is really as simple to execute as the feather stitch itself.
Unlike in the simple feather stitch, you don't need three, but two aid lines to accomplish an even width. If you draw them exactly the length of the planned stitch line, they will be stitched over completely. Just make sure the thread is thicker than the drawn line.
Closed Feather Stitch
Maidenhair Stitch
Deutsch | paariger Federstich |
English | maidenhair stitch |
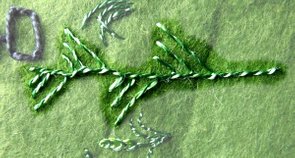
I discovered this simple, but beautiful stitch while searching for stitches suited for a variety of grasses - and that's what it is best known for. (I cannot deny that I was becharmed by its name as well. 😌) The maidenhair stitch is a variation of the feather stitch, and thus very easy to execute. For me it looks mostly like a horsetail herb.
As you can see, you first work a straight feather stitch with three branches, then change to the other side, so that you get a two-sided feather stitch in the end, but with three branches on each side instead of one.
The basic version of this stitch lets all three branches end at the same level. But of course you can, as with all stitches, give free reign to your imagination. The branches could end at different levels, there could be more or less branches than three, you can alternate the number of branches on each side, you can add a longer stem at the end or even in between ... there is a sheer endless amount of possibilities. Just get creative!
Maidenhair Stitch
No worry, the felt in the photo isn't wet, just photo edited. I had to reduce contrast and saturation in the surrounding area so you could make the stitch out better. It's not the peak of photo art, but it's the best photo I have.
Petal Stitch
Deutsch | Girlandenstich |
English | petal stitch, pendant chain stitch |
The petal stitch is a combination of a stem stitch of sorts and the detached chain stitch (lazy daisy). With the stem stitch as a base, it takes curves very well. You just have to take care to adjust the angles of the pendant chain links so that they would not get messed up too much.
Begin with a straight stitch and bring the needle up a certain ways back as you would in stem stitch. It should come up on the side of the thread, where you want your petals pending, about two thirds of the stitch length back. At this point work a regular lazy daisy at a sharp angle to the base line, as shown in the diagram below.
After bringing the needle down at the end of the tiny fixing stitch at the rounded end of the petal, bring it up about half of a stitch length farther in the line and down midways of the previous straight stitch, on the same side of the thread as you came up for the petal. This results basically in a stem stitch, save that the workflow goes the other way around: in a regular stem stitch, you would bring the needle down outside of the previous stitch and up inside it, but the result is just the same. (Strictly speaking the stitch in the diagrams above would be rather an outline stitch instead of a stem stitch.)
Finally, come up a little ways farther again, more or less at the end of the previous stitch, and continue working a lazy daisy, then an outline stitch again and so on. You end the line as you would a stem stitch / outline stitch line.
Petal Stitch
I used this stitch as an ornamental seam on a pocket of my needlecase.
Fern Stitch
Deutsch | Farnstich, Bäumchenstich |
English | fern stitch |
Español | punto helecho |
Français | point de fougère |
Italiano | punto felce |
Nederlands | varensteek |
Polski | ścieg paprotkowy |
Português | ponto pé de galinha |
When I first saw a fern stitch instruction, my first thought was: "You call that a stitch?" It didn't seem to be a proper stitch to me, because it consists of nothing but straight stitches. You can stitch everything stringing together nothing but straight stitches, after all. Anyway - ok, ok! - I had to buy it being a stitch on its own at the end of the day. It is fern stitch, face it. Nothing but straight stitches in three directions. Looks like a fern? Rather like a horsetail. Or an emaciated tree, as the case may be. 🙄
But look for yourself - it's that simple! Despite - or perhaps because of - as much as twelve graphics necessary to describe all those straight stitches. 😆
There is no reason why you shouldn't play with this stitch at your pleasure: longer and shorter stalks, longer and shorter branches, different angles ... Again, the aid lines are merely supposed to aid in obtaining perfection, if need be.
Fern Stitch
Wheatear Stitch
Deutsch | Ährenstich |
English | wheatear stitch, wheat stitch |
Français | point d'épi |
Português | ponto espiga |
Seems that this stitch causes in various languages quite a lot of confusion. In my sources, it is called point épi in French, punto spiga in Italian, punto de espina in Spanish, but a search in Google shows in all these cases either a fishbone stitch or a feather stitch. One source even calls it raised fishbone stitch (Nederlands dubbele visgraatsteek), although the illustration shows clearly a wheatear stitch. I found it on a Polish embroidery site under the name ścieg piórkowy (whereas piórko means feather!), but it is worked a little differently than the well known wheatear stitch, obviously. That is why I refrained from indicating all of the dubious names, limiting the dictionary to the unquestionable ones only. Though unquestionable might be questionable as well ... I hope the Portuguese name is correct, since it comes from a Portuguese lady?
Obviously, the wheatear stitch required even more graphics than the fern stitch, but it does so for good reason, because it is a far more complex stitch than the latter. Complex, however, isn't the same as complicated. The wheatear stitch is as easy to work as most of the stitches before, it just requires some more (simple) steps. Plus I wanted to show you how to add a stalk to the ear if you wish so.
As you can see in the graphics, you work two diagonal stitches first forming an angle. After coming up with your needle a ways farther down the line, you pass your needle through beneath the two diagonals without scooping any fabric, then bringing it down again in the same spot where it had come up. And the first kernel of the grain is complete. All the following steps are mere repetitions.
As with all the stitches, feel free to experiment with this stitch, e. g. working it in various lengths, widths, angles etc. You can see some of my own experiments in the photo below.
Wheatear Stitch
Herringbone Stitch
<<< mobile phones: drag the table to the left to see the whole entry <<<
Deutsch | Hexenstich, Kreuznahtstich, Rückseite des Schattenstichs |
English | herringbone stitch, plaited stitch, catch stitch, fishnet stitch, witch stitch, Moussoul stitch, Persian stitch, Russian stitch, Russian cross stitch, back of shadow stitch |
Español | punto de escapulario |
Français | point de chausson, point de picûre croisé envers |
Italiano | punto ombra rovesciato |
Nederlands | flanelsteek |
Português | ponto espinha de peixe, ponto sombra do avesso, ponto russo, ponto pé de galo |
Svenska | flätsöm |
The herringbone stitch is a nice border stitch that can also successfully be used as a filling stitch. That is to say, the "bones" can be placed so far apart or close to each other as you wish, so you can even cover the fabric as you would with a satin stitch.
To keep the height even, you can draw two auxiliary lines. If the aren't to be covered by a very dense stitching, you might use a self-extinguishing pen or a watersoluble pen. The latter can easily be removed by dabbing at the lines with a wet cotton ball.
The herringbone stitch is very easy to execute. First work a diagonal stitch as shown in the first diagram. The direction of this first stitch doesn't matter; you just have to work all the following stitches correspondingly. Then come up with your needle a littles ways back from the end of the first stitch on the same line, and work a second diagonal stitch in the opposite direction as the first. Again, come up a little ways back from the end of the second stitch; the distance should be the same as the distance between fhe end of the first stitch and the start of the second one. Work the next diagonal stitch parallel to the first one, come up a little ways back ... and so on. This way you get a line of alternating diagonal stitches crossing at their bases, looking a bit like a folding fence.
If you wish to work this stitch very dense, you have to change the angle of the diagonals. The herringbone stitch becomes denser, the more upright these diagonals are worked. Of course, in this case you will have to shorten the distance between each diagonal. Feel free to experiment with this stitch!
To fill a whole area with herringbone stitch, you will have to put in some compensatory stitches at the start and at the end. At the beginning of a line it isn't - at least for me - always easy to figure out where these stitches have to be placed. I usually help myself by making a sketch on squared paper, but I think you could also start with the first two or three stitches as shown in the diagrams above to get a better orientation, and only then put the compensatory stitches in.
Herringbone Stitch
Herringbone Stitch as a Filling
When you magnify the photo above you can see the herringbone stitch as a dense filling stitch in the little petals within the flowers.
Hungarian Braided Chain Stitch
<<< mobile phones: drag the table to the left to see the whole entry <<<
Deutsch | ungarischer Kettenstich |
English | Hungarian braided chain stitch; Hungarian braid stitch, Hungarian chain stitch, braided chain stitch |
The base of the Hungarian braided chain stitch is a reversed chain stitch the links of which get intertwined. This might sound complicated, and it might even look complicated at first glance, but in practice, if you follow the steps one by one, it isn't complicated at all. Just make sure to pass your needle below the correct chain link. This stitch results in a heavy decorative interwoven line.
Step 1
Work a short straight stitch.
Step 2
Come up with your needle a little ways farther.
Step 3
Pass your needle below the first stitch.
Step 4
Go down with your needle in the same spot where you last came up to work a (reversed) chain stitch.
Step 5
Come up a stitch length farther, as in step 2.
Step 6
Pass your needle again below the first stitch, as in step 3.
Step 7
Go down with your needle in the same spot as you last came up.
By now, you've got two loops fastened by the same anchoring stitch (the first straight stitch), the larger loop embracing the smaller.
Step 8
Again, come up a little ways farther, but don't pull your last stitch tight for the moment. Just leave a wide loop on the surface as is shown in the diagram below. This little "trick", though not imperative, will make the next step easier.
Step 9
Now comes the important part: you pass your needle below a loop again, but - and this is essential! - not the last one but the second last one! That is why we left the last loop sitting loosely, you see? This way it is much easier to spot and take up the second last loop to pass the needle below it.
Step 10
Only now, while your needle is still stuck below the second last loop, pull the last loop tight.
Step 11
Now pull the needle through the loop and go down in the same spot as you last came up, leaving a bigger loop on the surface.
Step 12
Come up a little ways farther.
Step 13
Again pass your needle through the second last loop, which is now the next loop to the previous one you've passed through. This is to say that it is solely the very first anchor stitch through which your needle passes twice. From that point on it passes through every loop only once. When you click on the third diagram below (the one in the middle of the line) to enlarge it, you can see very clearly which loop you have to scoop up this time.
Step 14
While leaving the needle stuck below the loop for a moment, pull the last loop tight with your fingers.
Step 15
Finally, pull your needle through and go down working the next chain stitch.
... and so forth ...
Later on, step #15 is the one you end your chain with after having worked as many links as you wished.
You see, though the Hungarian braided chain stitch is a far more complex stitch than those described before, if you are following it step by step, it isn't complicated to work at all. As with everything: if you've done it once you will quickly get the hang of it.
Hungarian Braided Chain Stitch
Credits for the multi-language stitch names:
agulhas da méri, Illustrated Glossary of Embroidery Stitches - 1
Dictionary of Stitches.docx - source unknown, please give me a hint, if you know something about the authorship (maybe an Italian blog?)
Mary Thomas's Dictionary of Embroidery Stitches
Pumora Embroidery, Lexikon der Stickstiche
KUFER z artystycznym rękodziełem
Ateljé Margaretha, Sömsätt
Marina Pastushenko
Mary Corbet, Needle'n Thread
Wikipedia


