Click on the images to enlarge them!
Outline Stitches
This "drawer" went originally under the name "Line Stitches", as I had in mind to assign the surface stitches (as opposed to counted cross stitches, which got a separate "drawer") to three categories only: line, filling and isolated stitches. The more stitches accumulated, however, the more obvious it became, that the line stitch drawer would soon be overcrowded. That is why I eventually resolved to apply the classification used in Mary Thomas's Dictionary of Embroidery Stitches, and even to stick to the same order in each drawer. An exception are the cross stitches, which are put on a separate page.
As outline stitches, we use to name all those stitches which cover a single line only instead of a wider area. This doesn't mean, however, that line stitches are not suitable for filling an area. They can be used as filling stitches, too, just by placing one line stitch next to the other.
Running Stitch
Deutsch | Vorstich, Steppstich |
English | running stitch, straight stitch, basting stitch |
Español | punto (de) bastilla, puntada corrida, puntada recta |
Français | point avant, point droit |
Italiano | punto filza |
Nederlands | rijgsteek |
Polski | ścieg przed igłą właściwy, fastryga |
Português | ponto adiante, ponto de alinhavo, ponto de passagem |
Pусский | шов вперёд иголку |
Svenska | förstygn |
Українська | шов упере́д го́лку,шов попередго́лку, затяганка |
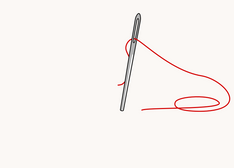
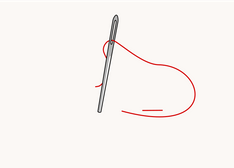
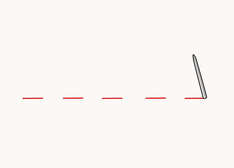
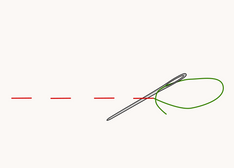
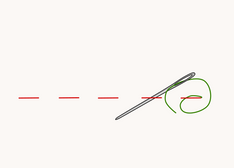
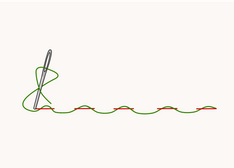
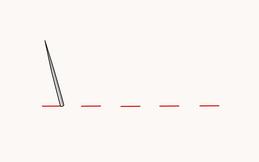
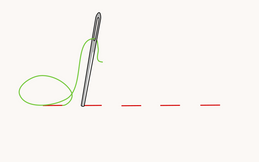
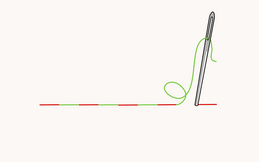
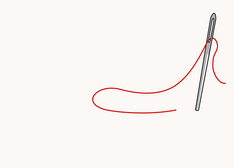
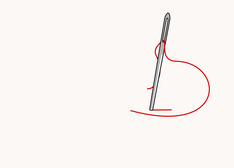
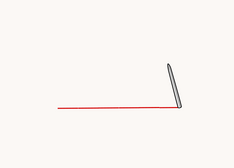
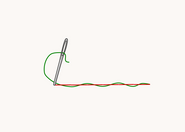
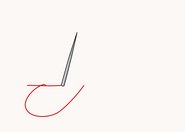
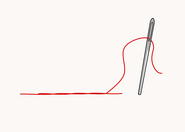
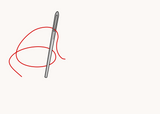
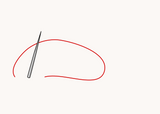
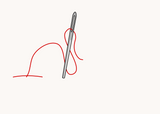
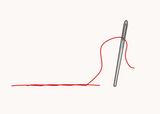
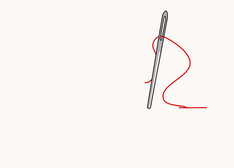
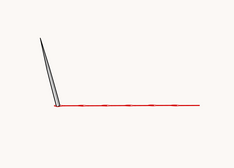
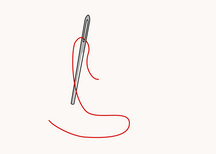
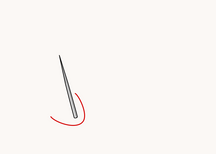
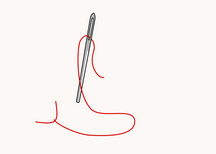
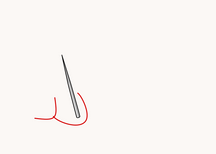
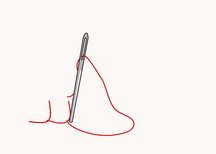
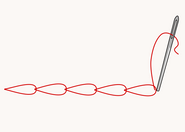
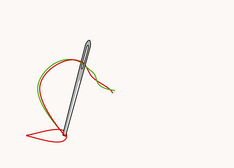
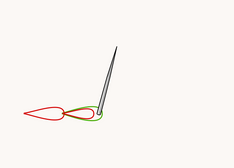
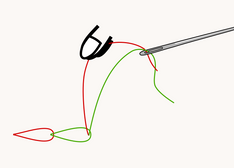
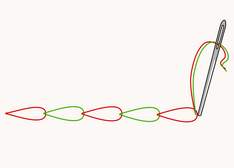
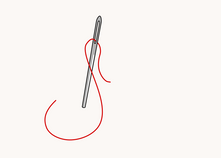
The running stitch, also called basting stitch, is the most basic of all line stitches. well, actually the most basic of all sewing and embroidery stitches. It is used both in counted embroidery, particularly in its version known as Holbein stitch, and in surface embroidery. The technique is as simple as can be: you bring your needle up to the surface of the fabric at the intended starting point, bring it down again at a certain distance, depending on the desired length of the stitches, up again, then down again and so on - all the time following the line you intend to cover.
You can play with this stitch just as you like; the stitches and the spaces between them don't have to be necessarily all of the same length.
Running Stitch
Whipped Running Stitch
Deutsch | umwickelter Vorstich |
English | whipped running stitch, cordonnet stitch |
Français | point avant surjeté |
Italiano | punto filza avvolto |
Português | ponto adiante apanhado |
There is a whole bunch of whipped stitches in embroidery. I will not list them as separate stitches, because, basically, whipping is always done the same way, though the result will look a bit different every time, depending on the basic stitch you whip.
For a whipped stitch, you work the basic stitch first. Then you change your needle to one with a blunt tip, a so called tapestry needle, in order to avoid snagging the thread with the tip of your needle. You come up with this needle right at the beginning of the stitches, then slide it through the first stitch without piercing or scooping up any fabric, repeat the same movement on the second stitch, and so on until the end of the line, where you put your needle down again right at the end of the last stitch. Whipping is normally done by carrying the whipping thread always from the same side of the line to the other - from right to left, left to right, top to bottom and suchlike.
Whipped Running Stitch
Holbein Stitch
<<< mobile phones: drag the table to the left to see the whole entry <<<
Deutsch | Holbeinstich |
English | Holbein stitch, double running stitch, line stitch, two-sided stroke stitch, square stitch, Roumaninan stitch, Chiara stitch |
Français | point Holbein |
Italiano | punto scritto |
Nederlands | dubbele rijgsteek, Holbein steek, Holbeinwerk |
Polski | ścieg Holbein, podwójny ścieg przed igłą, ścieg rumuński |
Português | ponto de alinhavo duplo, ponto romeno, técnica de Holbein, ponto Holbein |
Pусский | шов роспись |
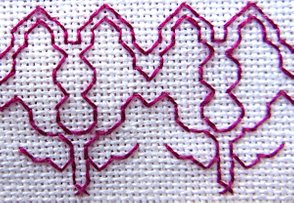
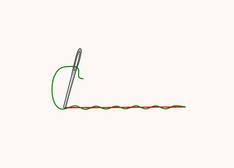
Basically, this stitch should be shelved under cross stitches, since it is commonly used in counted embroidery styles, such as blackwork or Assisi embroidery. But technically speaking, the Holbein stitch is a running stitch with the appearance of a backstitch. To accomplish that, you work the whole line in running stitch as usual, then turn the fabric over and work the same line backwards in running stitch again, but in a reversed order. That is to say, you put your needle in where the stitch in the first line comes out, and out where the stitch of the first line goes in, this way filling in all the gaps between the running stitches.
If you wish, you can change the thread colour when working in the opposite direction.
Unlike the backstitch, the Holbein stitch is a two-sided stitch, i. e. it looks the same on the back as on the front, plus it is a thread-saver. It is easy to work, if the pattern isn't to large and elaborate. With more complex patterns, however, the use of this stitch requires some practice and a good ability to keep track of the pattern.
Holbein Stitch
Backstitch
Català | repunt, puntada de tornada |
Deutsch | Rückstich, Steppstich |
English | backstitch, point de sable |
Español | (punto de) pespunte, punto atrás, puntada de vuelta |
Français | point arriére, point de picûre |
Italiano | punto impuntura, punto indietro |
Nederlands | stiksteek |
Polski | ścieg stębnowy, stębnówka |
Português | ponto atrás, ponto pesponto |
Pусский | шов назад иголку |
Svenska | efterstygn, sticksöm |
தமிழ் | பின்னோக்கிய தையல் |
Türkçe | arka dikiş |
Українська | стебнівка |
Tiếng Việt | thêu viền |
If well done, the backstitch is most reminiscent of a straight machine stitch. Just make sure to place your stitches evenly in a smooth line and to put your needle exactly in the same hole where the last stitch ends. This stitch is worked backwards on the surface and forwards on the back of the fabric, as shown in the diagrams below. On the backside, the backstitch creates a kind of stem stitch, while the latter forms a backstitch on its backside, hence these two stitches can be deemed reversible.
Backstitch
Whipped Backstitch
Deutsch | umwickelter Rückstich |
English | whipped backstitch |
Français | point arrière surjeté |
Português | ponto atrás apanhado |
The working sequence is the same as in the whipped running stitch. Work a row of backstitch, then using a tapestry needle, pass a second thread through each backstitch top down or bottom up, but always in the same direction.
Whipped Backstitch
Laced Backstitch
Deutsch | umschlungener Rückstich |
English | laced backstitch |
The difference between a whipped and a laced stitch is, that in the latter, the second thread is carried under each stitch only. Move the needle through beneath the first stitch top down, then beneath the second stitch bottom up, beneath the third stitch top down again and so on. The result is a nice wave line, which you can pull tighter or looser according to your own wishes.
Laced Backstitch
Stem Stitch
<<< mobile phones: drag the table to the left to see the whole entry <<<
Deutsch | Stielstich |
English | stem stitch, crewel stitch, stalk stitch, South Kensington stitch |
Español | punto cordoncillo (hilo a la derecha), punto de tallo |
Français | point de tige |
Italiano | punto erba (filo a destra) |
Nederlands | steelsteek (draat nar rechts) |
Polski | ścieg sznureczkowy |
Português | ponto pé de flor, ponto cordão, ponto haste |
Pусский | стебельчатый шов |
Svenska | stjälkstygn (högersydda) |
The stem stitch is an all-time-to-go stitch, when it comes to working nice straight lines. It is easy to perform, it looks nice, and depending on the length of the individual stitches, it forms either a slightly, but evenly twisted line, bolder than a split stitch line, (long stitches) or a distinctly twisted rope-like line (short stitches).
The most important thing about the stem stitch is the position of the working thread, which is opposed to that of the outline stitch. This position depends on the stitch direction. Simply put, it should always lie below the needle when considering a workflow from left to right. That implies the following rules:
Workflow | Position of the thread in relation to the needle |
left to right | below |
right to left | above |
top to bottom | lefthand |
bottom to top | righthand |
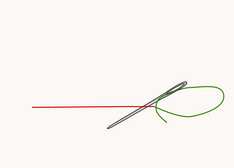
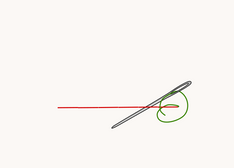
To work this stitch, bring your needle up at the starting point, go down one stitch length farther. Don't pull your thread tight yet, but leave a small loop to see where you have to come up with your needle, which is in the middle between the two stitch points, taking the needle halfways back. Only now pull the thread completely through. The next stitch should be of the same length as the first one, that is you bring your needle down more or less half a stitch length away from the end of the last stitch, and, again, come up with in the point where the previous stitch ends.
To end the line, just bring your needle down as you would for a next stitch.
Stem Stitch
As in most of the outline stitches, you can of course whip the stem stitch. The working principle is the same as in the whipped backstitch.
Outline Stitch
<<< mobile phones: drag the table to the left to see the whole entry <<<
Deutsch | Umrisslinienstich, Stielstich |
English | outline stitch |
Español | punto cordoncillo (hilo a la izquierda) |
Français | point de tige contrarié |
Italiano | punto erba (filo a sinistra) |
Nederlands | steelsteek (draat nar links) |
Polski | ścieg sznureczkowy |
Português | ponto pé de flor, ponto cordão, ponto haste (fio à esquerda) |
Svenska | stjälkstygn (vänstersydda) |
The outline stitch is the mirror-inverted sister of the stem stitch. When working this stitch, you just keep the working thread to the opposite side as in stem stitch. This is to say, when you are working from left to right, the working thread lies above the needle. For other stitch directions, you just reverse the thread position from the little table above:
Workflow | Position of the thread in relation to the needle |
left to right | above |
right to left | below |
top to bottom | righthand |
bottom to top | lefthand |
As unimportant as the position of the working thread might seem, it does make a significant difference to the appearance of the stitch. An outline stitch will never show the same ropey look as the stem stitch does. It looks more like an undifferentiated, slightly twisted line. That's why it is best suited for ... you guessed it - outlines.
In the graphics above you can see this difference best if you enlarge them by clicking on them. Also, compare the two photos of the stem stitch and the outline stitch, and you'll see the difference in the outcome. The sample isn't the best stitching in the world, it isn't even good stitching, but compared to the stem stitch sample, you can see that, even if you'd like to call it a rope, it is a very loosely and unevenly twisted rope, not nearly as distinctly structured as the stem stitch rope.
Outline Stitch
Split Stitch
Deutsch | Spaltstich |
English | split stitch, Kensington outline stitch |
Français | point de tige fendu |
Italiano | punto diviso |
Polski | ścieg rozłupany |
Português | ponto fendido |
This stitch is my absolute favourite when I need a fine drawn line. Because of the fluent passage from one stitch to another, the resulting line gets a much more continuous appearance than a backstitch, chain stitch or stem stitch line. Stem stitch looks more or less ropey, and it is thicker, while backstitch looks like a dashed line with the dashes close together. Split stitch is most similar in appearance to chain stitch, save that the "chain links" here are barely visible.
To achieve this fluent appearance, work a straight stitch and bring your needle up from the back to the front of the fabric right through this stitch. In other words, you split the thread, but you split it always from the bottom up, not the other way round.
Split stitch works best with a single thread. You can split only one thread at a time, that's why using more than one thread makes no sense - it just wouldn't look like a split stitch.
That said, and as I am always willing to learn, I discovered by observation and trial, that a split stitch with two threads can look well, indeed. It results in a quite bulky appearance. I recommend to split one of the two threads, anyway. However, if you use it as a filling stitch, e. g. in needlepainting, it even doesn't harm to come up with the needle between the two threads, provided your stitches sit dense enough to each other. Just be prepared for a rather bulky surface.
Threads with a wider spread (coverage), such as Coton floche à broder (floche), spun silk, or crewel wool, are generally easier to split than a single thread of stranded cotton, though I personally don't have problems with the latter either. If you have difficulty splitting a thread from the back, just give the thread a little tug before splitting it, so that it lies flat and tight on the fabric.
Split Stitch
<<< mobile phones: drag the table to the left to see the whole entry <<<
Dansk | Knaphulssting |
Deutsch | Schling(en)stich, Festonstich, Languettenstich, Knopflochstich |
English | buttonhole stitch, blanket stitch, button stitch |
Español | punto (de) festón |
Français | point de feston, point de boutonnière, point de grébiche |
Italiano | punto festone,punto smerlo, punto asola, punto occhiello, punto coperta |
Nederlands | knoopsgatensteek, festonsteek, dekensteek |
Polski | ścieg dziergany, ścieg zadziergiwany |
Português | ponto de recorte, ponto de casear |
Svenska | Langettstygn |
Türkçe | ilik dikiş, battaniye dikiş |
There is some confusion around the name of this stitch. The opinions are divided as to what should be called a buttonhole, what a blanket and what a tailor's buttonhole stitch. For reliable information on this issue, I refer you to Mary Corbet's respective article on Needle'n Thread.
As you can see, the blanket stitch is exactly the same as the buttonhole stitch (while tailor's buttonhole is worked differently) with the only difference lying in the spacing of the spokes (and its traditional use as a finish to the edges of blankets). That is why I will not provide a separate description of the blanket stitch - it all runs under buttonhole stitch. You can space the stitches just as you like, and - let's be honest: what's in a name?
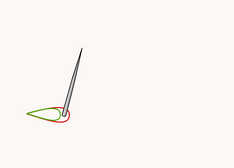
To work a buttonhole stitch, bring your needle up on the baseline. Go down in the distance you wish to be between the spokes plus a spoke-length above the baseline, but don't pull the thread tight, leave a loop. Then come up inside this loop on the baseline again, straight below the point where you last went down. Now pull the thread through. And that's all there is, basically.
To end the row, work a tiny anchor stitch on the baseline outside of the last stitch, as shown in the last diagram.
Technically spoken, buttonhole stitch is a very simple stitch. Just take care not to pull the thread too tight, after you came up within the loop, so as not to distort the stitch. The whole secret of a nice appearance lies in the correct tension, the even spacing and an even length of the spokes, especially when working this stitch in a circle, as in a buttonhole wheel.
Buttonhole Stitch
Buttonhole Circle
And here's just for fun ...
... My Very First Buttonhole Wheels
But there's a visible learning curve! 😁
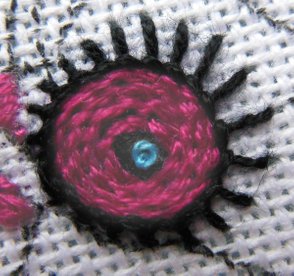
To work a buttonhole wheel, you just bring your spokes down in always the same spot, spacing the upcoming stitches on the outline only. After coming up, make sure to pull your thread gently outwards, away from the centre, in the direction of the next stitch, in order to achieve a nice circular outline.
Chain Stitch
<<< mobile phones: drag the table to the left to see the whole entry <<<
العربية | غرزة السلسلة |
বাংলা | চেইন সেলাই |
Deutsch | Kettenstich |
English | chain stitch, tambour stitch |
Español | punto de cadeneta |
Français | point de chaînette |
Italiano | punto catenella |
Nederlands | kettingsteek |
Polski | ścieg łańcuszkowy |
Português | ponto cadeia |
Pусский | шов цепочка, тамбурный шов |
Svenska | kedjesöm |
Türkçe | zincir dikiş |
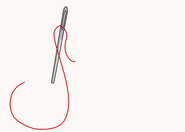
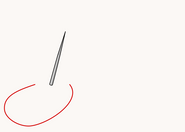
To work a chain stitch, bring your needle up at the beginning of the line and down in the same hole, leaving a certain length of thread on the surface. Then bring your needle up a little ways down inside this loop, and pull the thread through. Don't pull it too tight, just so that it creates a kind of a chain link. Next bring your needle down again in the same hole it had come up, then up again a little ways down inside the working thread, pull the thread through etc.
To end the line, come up inside the working thread and bring your needle down outside it, right next to the point where it had come up.
Chain Stitch
Also the chain stitch can be whipped. To do this, pass your tapestry needle (see whipped backstitch) under each chain stitch, always in the same direction.
Chequered Chain Stitch
Deutsch | zweifarbiger Kettenstich, magischer Kettenstich |
English | chequered chain stitch, magic stitch |
Polski | łańcuszek dwukolorowy |
Wanna work some magic? Not that embroidery wasn't magic in itself, right? So you could say we're gonna work a double magic. We're gonna work a chain stitch in two colours and all that in one go. Actually, it's not magic at all, of course, but a very simple technique.
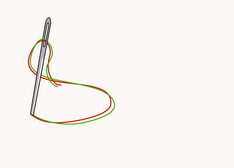
To execute a chequered chain stitch, thread your needle with two strands of floss in two different colours. Begin as you would a normal chain stitch: come up at the beginning of the line, put the needle down in the same hole, leave a loop of thread on the surface. In this case, it will be a loop of the two threads.
And now comes the trick: Bring your needle up a little ways down inside the loop, but only inside one loop of thread, that is the strand of the colour you want to begin with. To do that, the other loop of the second colour has to be cast aside a bit, so that it remains untouched - more or less like in step 2 of the diagram below.
Before you bring your needle down again in the same hole, you have to pull this second thread through separately, because it is a bit longer now than the first. So as not to leave a loop on the backside.
Next come up inside the loop again, but this time inside the second colour while casting aside the loop of the first colour. Again, after pulling the threads through the fabric, give this last thread an extra little tug to pull it through completely.
Thus alternating the colours in every chain link continue working your chain stitch line, until you anchor your threads outside the last link as you would do with normal chain stitch.
Chequered Chain Stitch
As you can see in the photo above, the colour sequence in the chequered chain stitch isn't limited to one by one only. You can easily alternate them two by two, one by two etc. as well. A more irregular sequence (and even more so more than two threads), though, can be quite troubling, as I learned in my Colbert embroidery practice piece.
Coral Stitch
<<< mobile phones: drag the table to the left to see the whole entry <<<
Čeština | korálkový steh |
Deutsch | Korallenstich, altdeutscher Knüpfstich, Schneckenstich |
English | coral stitch, coral knot, beaded stitch, German knot stitch, knotted stitch, scroll stitch, snail trail |
Español | punto coral |
Français | point de corail |
Nederlands | koraalsteek |
Well, this one's true name must be confusion. The Confusion Stitch.
First, I have to admit, that it is a little more complicated stitch. At least I am that way, that everytime I want to work this stitch, I have to fiddle about through the first stitches, which way I should put the thread around.
Second, this was reflected in constructing the illustrations below - I had to grab a piece of fabric, needle and thread in order to straighten out what I should draw.
Third, the confusion extends even to the stitch names! It is called coral stitch in English, but googling the equivalent in other languages brings up a lot of feather stitches, sometimes, if you are lucky, alongside this coral stitch we're talking about. Also, one of the alternative names in English is scroll stitch, though I know scroll stitch as a completely different stitch.
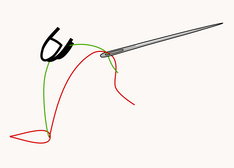
Anyways, here is the graphic illustration for this stitch, accompanied for clarity by a written explanation, because the drawings are posing some difficulties as well in discerning which thread is which.
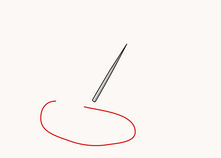
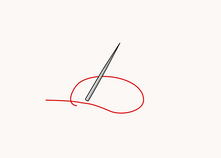
That's it: few pics necessary, but maybe a little confusing anyway. Just follow the step-by-step instruction below, comparing every step with the corresponding picture. Once you worked through the sequence, you shall see that the stitch itself isn't complicated at all, it requires just a little attention and circumspection.
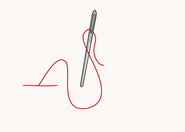
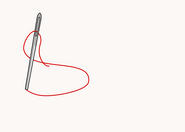
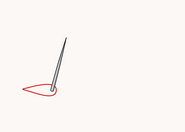
1. Work a straight stitch, placed slightly off the line. Don't pull the thread through, just leave a loop on the surface.
2. Come up a little ways farther within the line to be stitched, but don't pull the needle through yet.
This is why this stitch is a bit difficult to demonstrate the way I do it. Normally, most stitch guides use for their illustrations the so called "sewing method", where you scoop the fabric with your needle, going down and coming up in one single motion. The reason for it might be a lack of space for illustrations or the like.
I decided firmly to use the so called "stabbing method" in my stitch instructions (after all, I have the space), because most people embroider in a hoop or a frame, where you can't (or at least shouldn't) scoop the fabric, so as not to loosen it. Ok, there is a couple of stitches that require scooping the fabric (such as Bullion Knots, for example), but I would want to avoid it wherever possible.
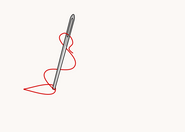
3. And here is the important part: loop the thread around the sticking out needle placing the working thread (that is the part of the thread coming from the needle) under (or behind) the needle, while the thread coming from the first point (or the last stitch resp.) comes to lie over (or before) the needle. When you enlarge the picture above (just click on it), you will see how the thread should be arranged. I think the image is clear enough, after all.
If you still struggle to see it, it might help to imagine how the needle would be positioned if you were to use the "sewing method". It would lie flat on the fabric, in our example from "bottom up". The working thread should now be pulled from the side of the eye onwards over the tip of the needle so that it comes to lie under it forming a loop around the tip.
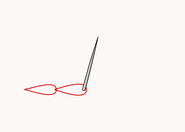
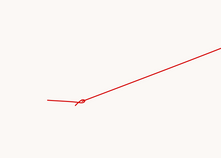
4. Pull needle and thread through. The loop now forms a little coral(or whatever)-shaped knot. Don't pull too tight, however, so as not to distort the stitch, try to figure out the right amount of tension necessary.
5. = 1. - start of a new sequence
Coral Stitch
Credits for the multi-language stitch names:
agulhas da méri, Illustrated Glossary of Embroidery Stitches - 1
Dictionary of Stitches.docx - source unknown, please give me a hint, if you know something about the authorship (maybe an Italian blog?)
Mary Thomas's Dictionary of Embroidery Stitches
Pumora Embroidery, Lexikon der Stickstiche
KUFER z artystycznym rękodziełem
Ateljé Margaretha, Sömsätt
Marina Pastushenko
Mary Corbet, Needle'n Thread
Wikipedia

